BUNKHOUSE RENOVATION 4
Here are some more photos of the Bunkhouse Project.
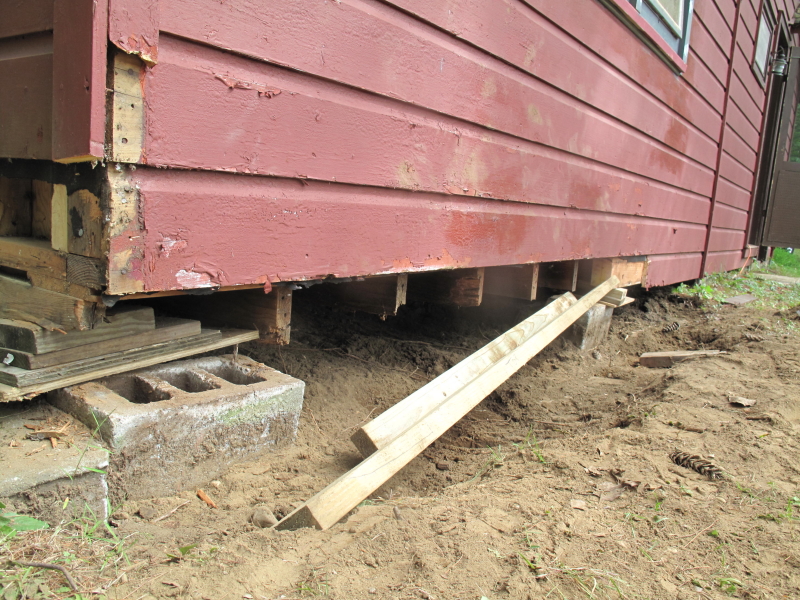
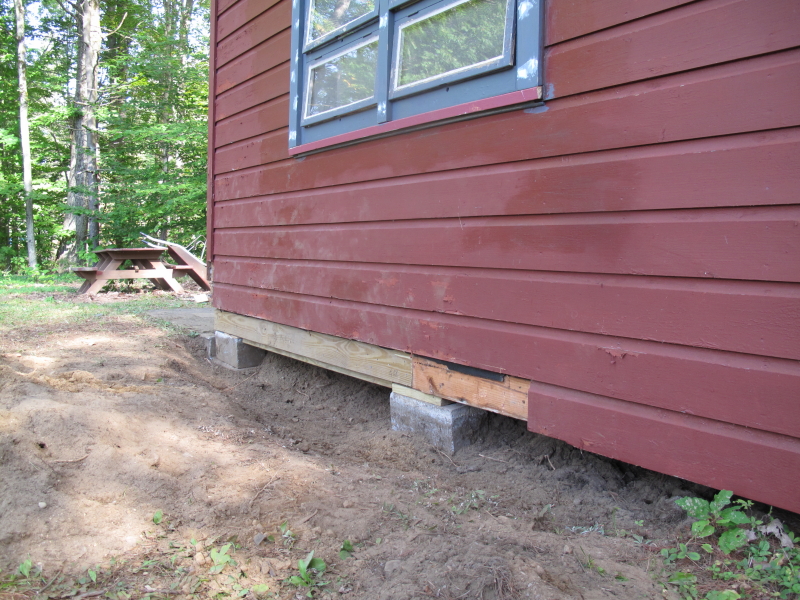
Late Saturday we went to Lowes and picked up some treated lumber for the new sill plates. I spent all day yesterday, Sunday, planning and figuring
and cutting all the pieces. I slid four new floor joists under the cabin and have them blocked close to where they should be nailed. Then I measured
out and cut front and back sill plates and screwed a 2x4 ledger strip onto each to help line up the floor joists. I think I am ready to reassemble the floor
parts but I was working alone all day and it will take at least two to line everything up before it can be nailed. I also think two small bottle jacks might
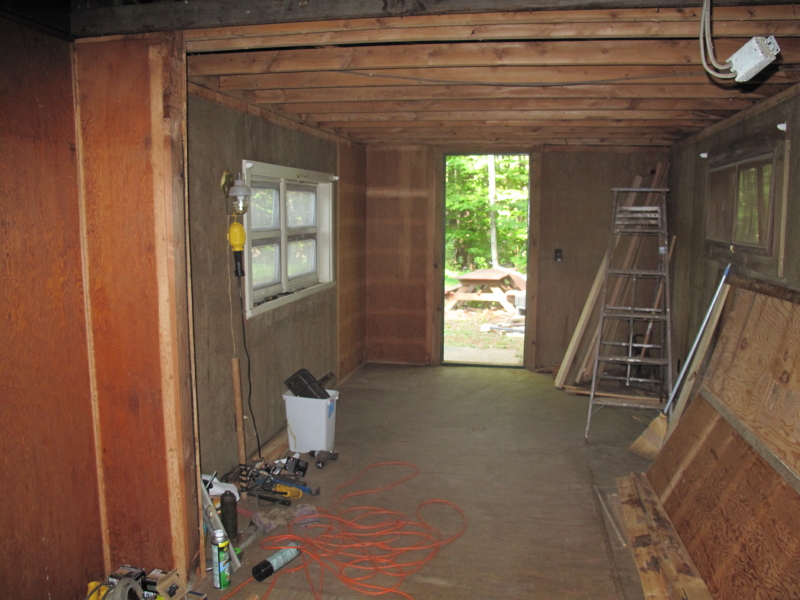
help to line the new joists up with the old before nailing so the final assembly may wait until next weekend. I can't remove much more inside the building
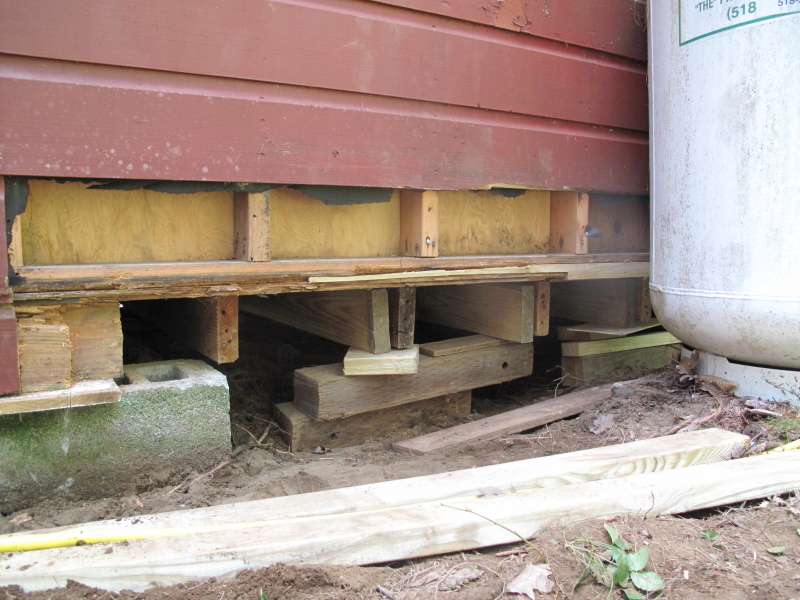
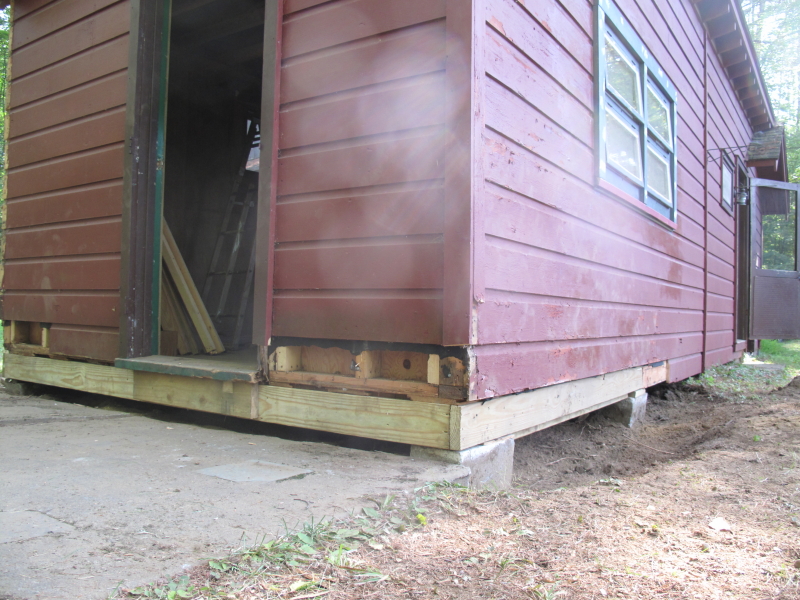
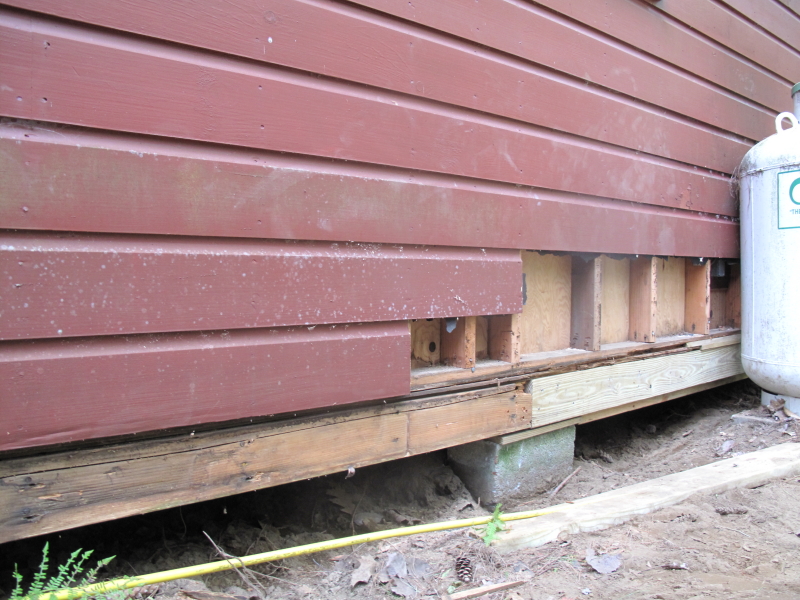
while it is jacked up as it is hard to tell which brace may be holding things together. It sure snaps and pops when it is jacked up a couple of inches. The first photos below will show the parts ready to install. The ends of the floor joists were pretty rotten and full of carpenter ants on the front side of the
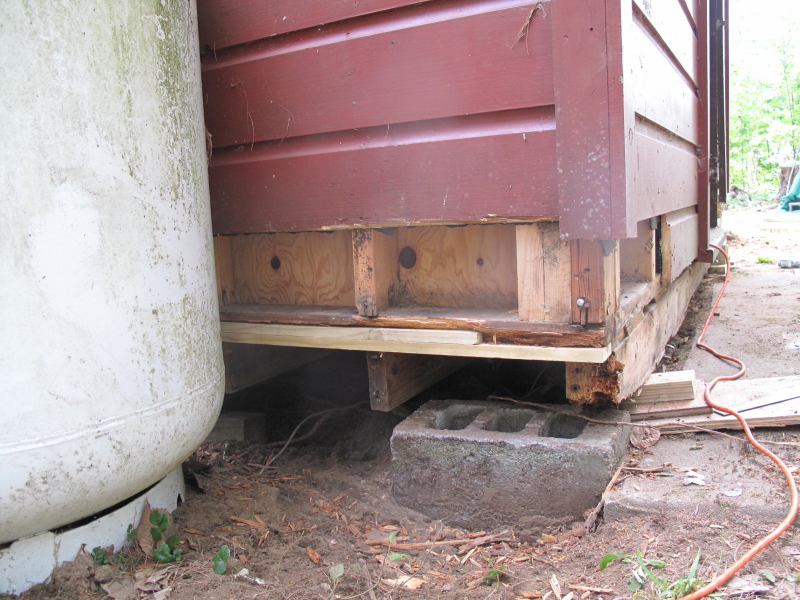
cabin. You can see all the patching i tried to do on the back by the propane tank. The joists were good there but the subfloor and half of the 2x4 sill plate
has been rotted off at least half way back towards the pump house. Probably even farther but I had to stop somewhere. Not sure if my patch work will be all that is
needed to provide the necessary support for the new sill plates. There really isn't a decent surface left in that area that the building will be sitting on the new sill. Today, Monday, I ran to Johnstown and bought several lengths of the matching wood siding to use for the final repairs. Mom primed the back side and will paint the
front tomorrow. I spent the rest of the afternoon cleaning up the old siding making sure the new siding will fit into the overlapping groove. I did pull the plywood
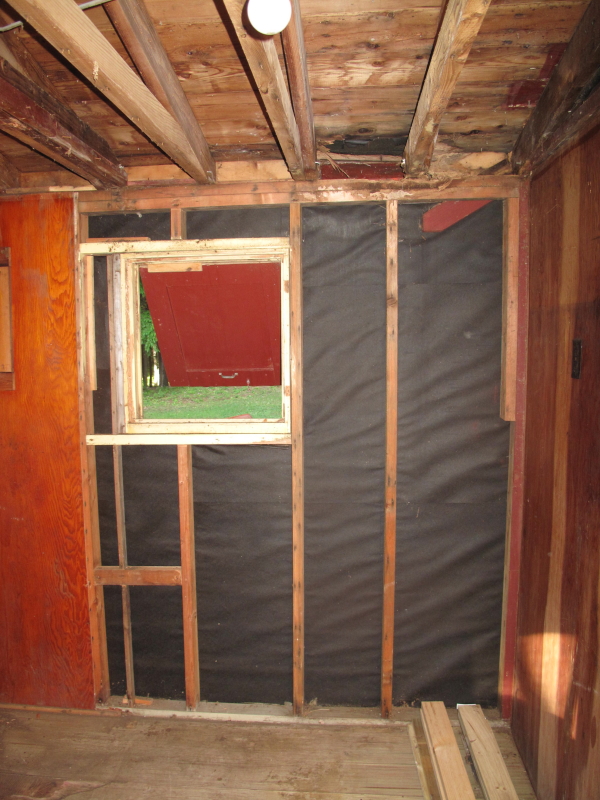
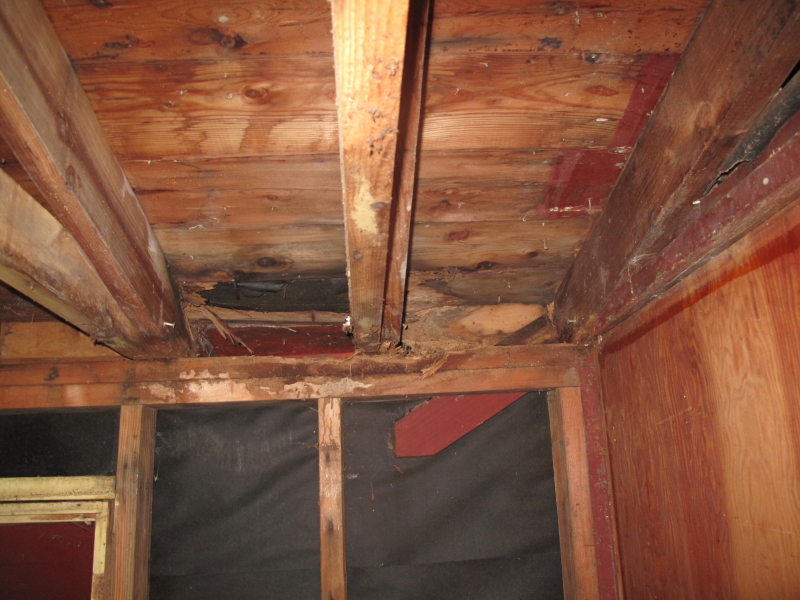
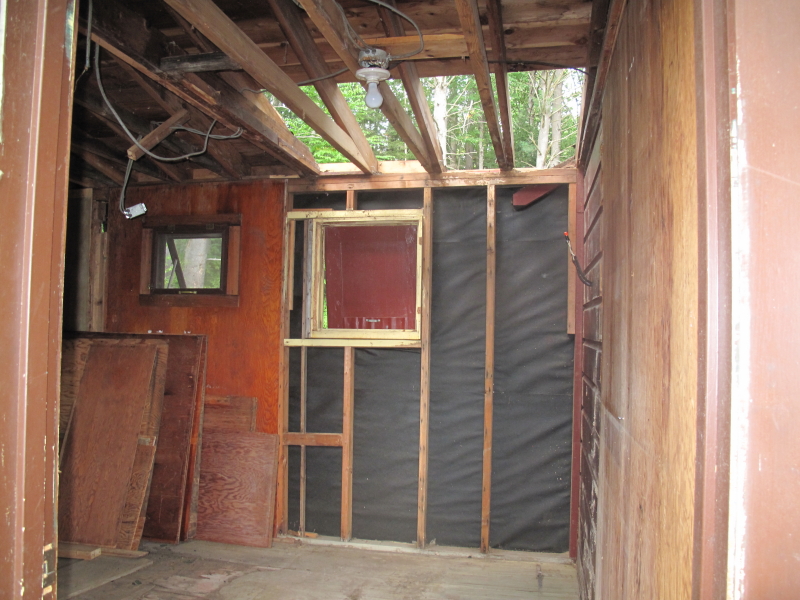
off the inside corner wall where the roof is rotten. I thought I would find that the water had dripped into the wall and started that to rot as well but the inside of the wall
looks surprisingly good. I may pull the rest of the plywood interior walls tomorrow just to make sure everything is solid and clean in there. That will make it
easier to move the existing outlets up a little higher on the wall and add some additional ones.
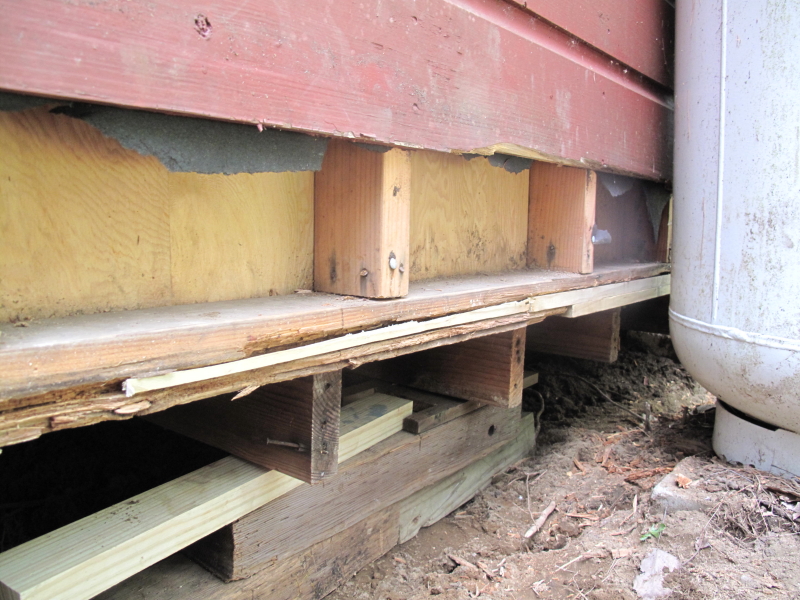
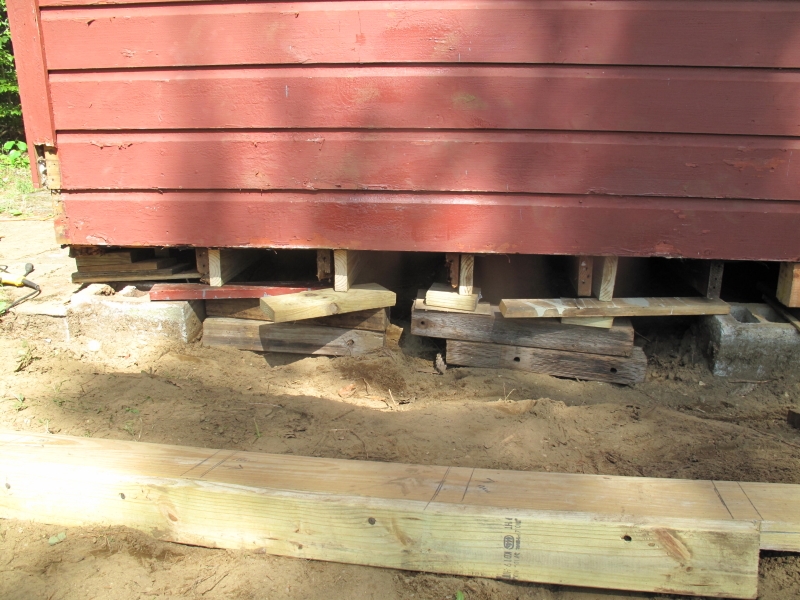
James came up for the weekend to help me with the replacement sill plates and floor joists. We had a big day Saturday but did get all the new wood installed and the cabin jacked back down onto the new supports. I may not replace the siding until next year so the cabin has time to settle into place. We nailed the four new floor joists to the existing rotten ones as far under the cabin as I could reach and then James went inside and added a bunch of long screws down through the floor and into both the new and old joists. I still have to add some long nails to the sill plates outside and down into the new supports. I had to cut the walls loose from the existing supports in order to get the old ones out so I need to try and reattach them as best I can. We got all the new wood installed on Saturday so we picked up our mess and I did spend some time removing the old closet that was in the back corner.
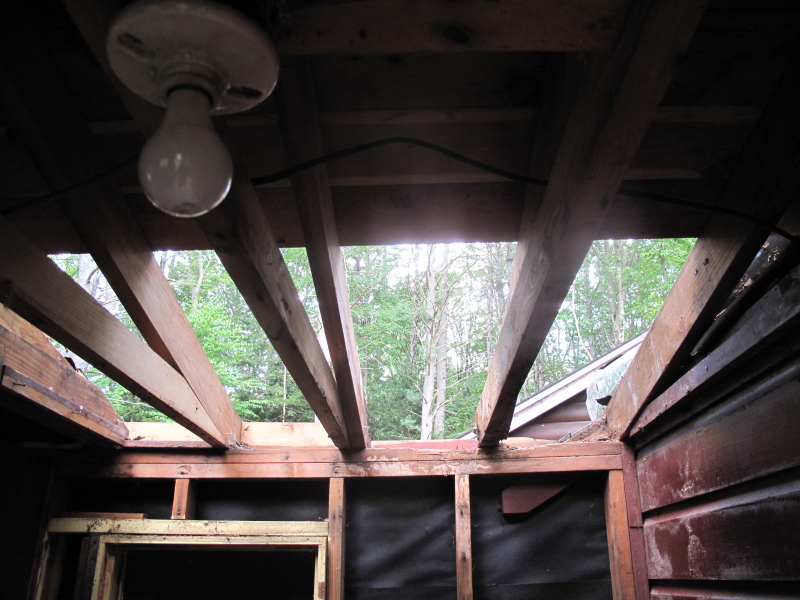
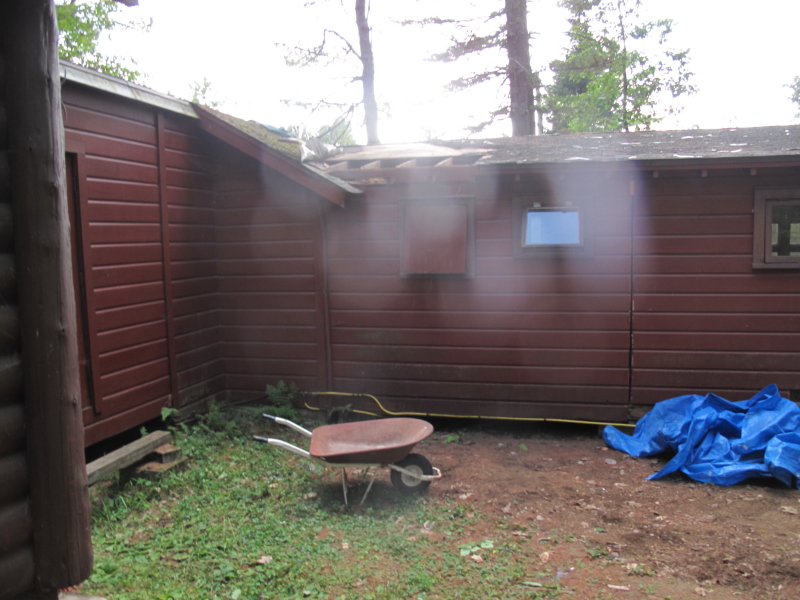
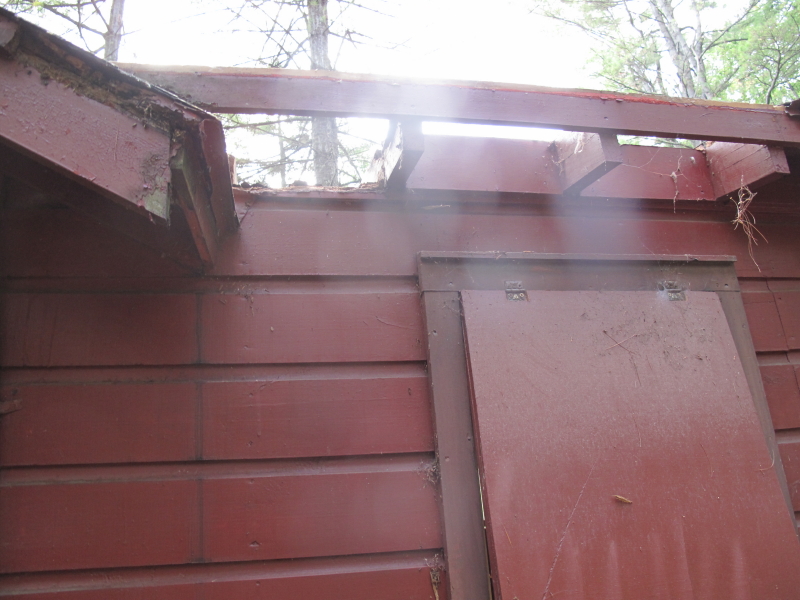
On Sunday I decided to tackle the rotten section of the roof while James was here to help. There was several feet of rotten would in both directions where the old refrigerator used to be. I decided to remove the shingles over that section so I can see to replace the upper sill plates and double up the rotten roof rafters. I found a small crack in the large aluminum flashing that seals the bunkhouse to the pump house that may have been letting water run down the roof under the shingles. We had shingled this roof about 25 years ago and had gone over the old shingles that had been there. The new shingles were pretty well worn so I have decided to reshingle the entire roof. No sense in doing all the work inside if the roof may not last too many more years. The old roof that was underneath was really falling apart and the shingles just turned to powder in many places so it all needs to be completely stripped to bare wood. There were several places where the old shingles looked wet underneath the new shingles so I guess it was time to replace everything. You can see the hole in the roof in the photo. I will add a sheet of plywood to cover all that section after I make my repairs and may consider adding another layer of plywood over the entire roof. James and I did get the newer shingles stripped and we got them loaded into the truck so I can take them to the transfer station in the morning. We are here a few more days this week so I will work on stripping the old shingles and pulling all the nails in preparation for the new shingles. That will be a slow process but it has to be done in order to get a good shingle job.
 |
 |
 |
 |
 |
 |
 |
 |
 |
 |
 |
 |
 |
 |
 |
 |
DO YOU WANT TO SEE MORE OF THE RENOVATIONS? CLICK HERE!
THIS IS THE FINE PRINT